Cat-proof fencing
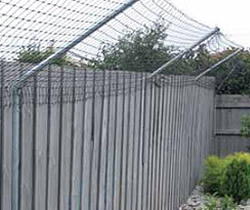 Have you considered cat proof fencing to keep your cat contained and safe? Cat proofing your fencing provides your cat with free access to all or part of your yard. As an example, see Figure 1 for a photo of a completed cat proof fence.
If you have a small yard then this may be a better and cheaper alternative to building a cat enclosure. An ideal spot for cat proof fencing is that narrow area between the house and a fence that can be closed off at each end by gates.
These are some of the things you might consider when building a cat proof fence.
Some basic design considerations
Cats should have access to the house through a cat door. If there are times when the cat has no access the house, they need to have a weatherproof sleeping area with a bed and an adequate supply of fresh water while in the yard. There must be no dangerous items in the yard or sharp edges used in the fencing.
In most instances, fence extensions are legal as long as they are entirely on your side of the fence (for example, not directly above the fence, or intruding over to the neighbour's side). Some properties may have covenants in place restricting the height of fences. Check with your local council to see if this applies to your property.
Cat proof your yard
The first step in cat proofing your yard is to seal off all gaps in and underneath the existing fences and gates. Cats do not usually dig underneath fences.
If your cat shares the yard (or is next to a yard) with a dog that digs, you may need to put a concrete or wooden plinth in the soil under the fence to prevent the dog opening up an escape route. In addition to 'cat proofing' your gates, lock any gates that are used infrequently and fit self-closing springs and latches to all other gates around the yard.
When building a cat proof fence ensure there are no sharp edges used which can injure your cat.
If you have a problem with other cats coming into your yard, you will have to watch to see if they are able to climb over the cat proof fencing. Most cats should find the netting too unstable to climb on. However if they can get in, you will have to ask your neighbour to install the cat proof fencing on their side of the fence too (to avoid visiting cats becoming trapped in your yard).
Before considering any treatment it is best to observe your cat's behaviour to see how it is escaping from the yard including any possible jumping points that the cat may use to clear the fence, such as material, equipment or objects placed near or against it.
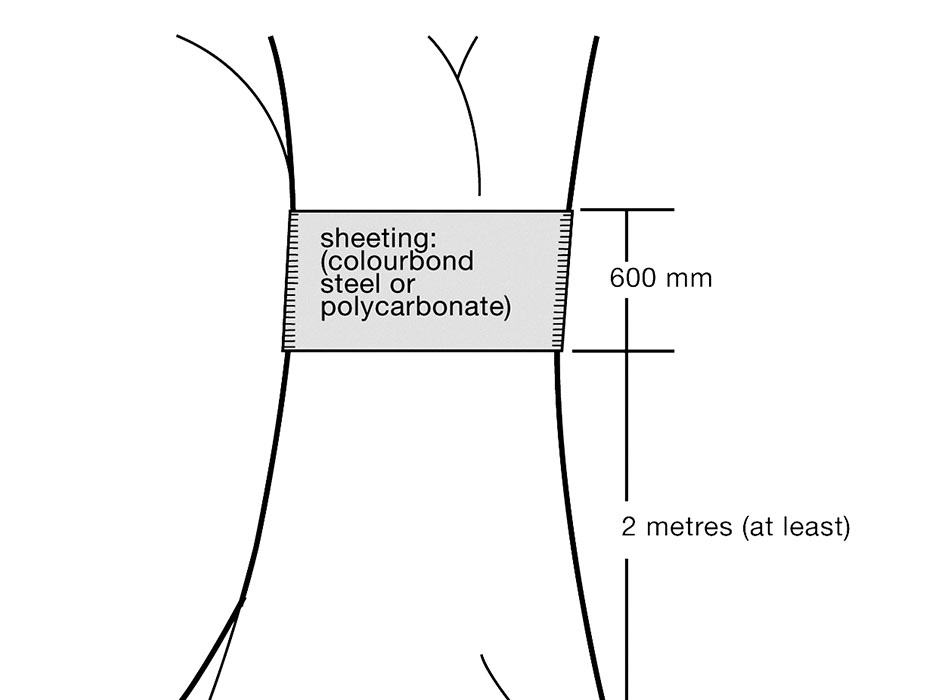
Trees and shrubs can be trimmed back or alternatively a net barrier can be erected to block cat access to the launching place. Larger section tree trunks can be banded with a 600mm wide piece of sheeting (ensure this is at least 2 metres off the ground). Colorbond steel or clear polycarbonate is ideal. See Figure 2.
Following installation of cat proof fencing, it is important to supervise your cat carefully, until you are confident that it is not able to escape.
How to build a cat proof fence using a net barrier
Tools needed
- cordless drill
- pliers
- Tec screw driver bits
- wire cutters or scissors
- hammer
Materials
- pipe supports
- staples or galvanised speed brace
- soft tie wire
- wire clips
- Tec screws
- screws or masonry plugs
- netting at 900mm width
The pipes to support the netting can be made up by your steel supplier from 25mm tubing. Any flexible netting is suitable provided it is strong, UV stable and rot resistant.
The netting used in Figure 1 is similar to a tennis net and has 50mm openings. Ensure holes are small enough so your cat can't get its head caught in the netting. The key to the netting is that it is 'floppy' enough to feel unstable and unsafe for the cat to climb on. Therefore avoid using rigid netting such as galvanised mesh.
Step 1 — Measure and plan the project
Measure the required length of the 25mm tubing. The pipes will run vertically up the fence, before angling in towards the property (the angled section of the pipe should be 0.7 metres long and be on an angle of at least 35 degrees). See Figures 1 and 3 for examples. Netting at this angle is difficult for cats to climb over.
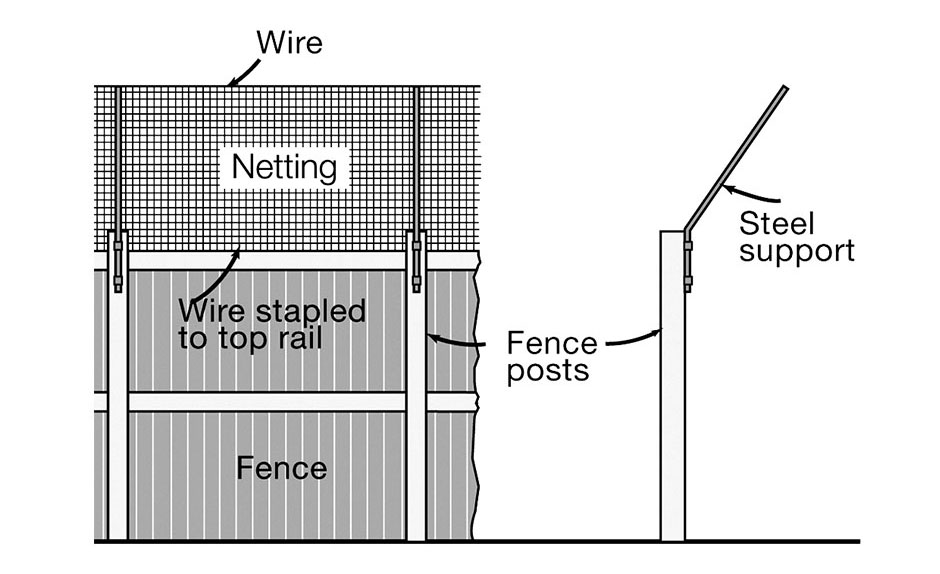
The total height of the fence including the netting structure should be at least 2 metres, to prevent the cat from jumping over it (some cats can clear 1.8 metres in a single jump).
Calculate the number of supports required and check prices with your supplier. Pipe supports need to be fitted on fence posts, corners and gates at no more than 2.8 metres apart.
Measure the length and width of the netting required. The netting will be affixed to the existing fencing and to the top of the angled section of pipe.
Stage 2 — Painting
Before you start affixing the pipe supports, paint any non-galvanised steel with metal primer and paint.
 Stage 3 — Affixing to the fence
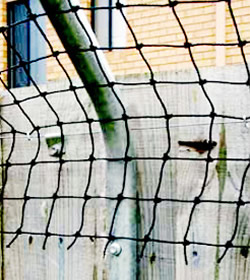
The supports are fixed to the fence with saddle clips or clamps.
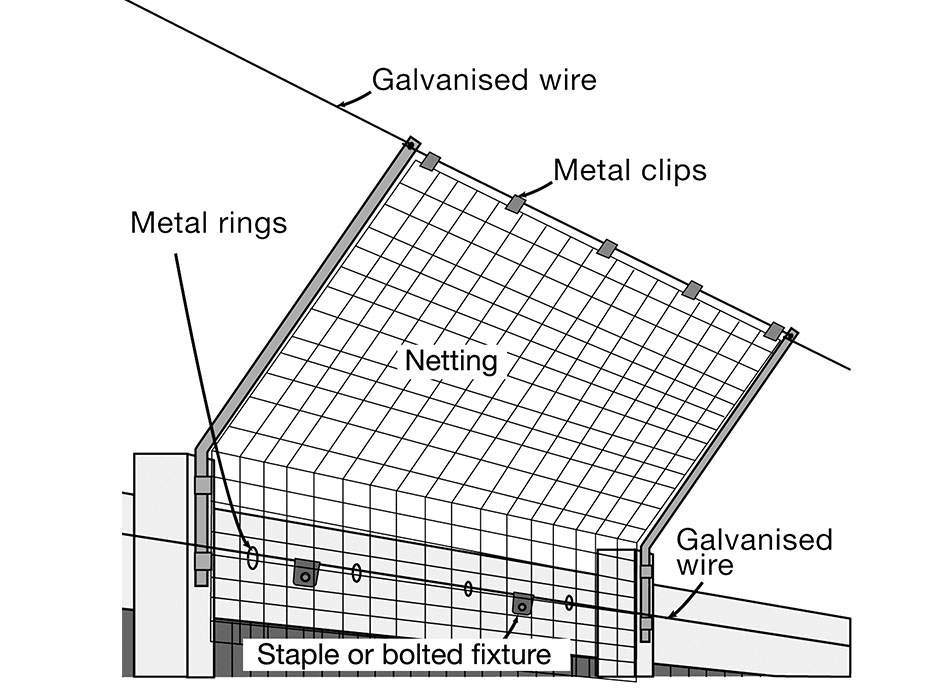
Drill a small hole in the top of each support and run a length of galvanised tie wire around the top through these holes. Fix the netting to the top wire with metal clips. See Figure 4.
The netting can be secured to the top of the fence with staples and a run of wire. See Figure 5.
Staples attach the run of wire to the fence and metal rings are used to attach the wire to the netting. Make sure the netting is secured to the fence at regular enough intervals so your cat will not be able to escape by squeezing between the fence and the netting.
The netting can also be attached to the top of the fence using galvanised speed bracing. See Figure 6. This involves placing netting against the top of the fence and 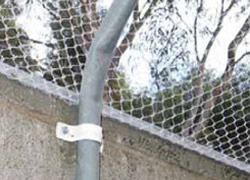 then securing it by applying speed bracing over the top.